⚠️ Without your descriptor, no alert provider can send you alerts.
Without ARNs, you won’t receive RDR alerts, which cover 97% of Visa transactions.
⭐ Optimization Tip: Do you want automatic refunds for CDRN and Ethoca with Stripe? See this guide to learn how to connect to our Stripe app.
How to Find Your Descriptor & ARNs in Stripe
1. Finding Your Stripe Billing Descriptor
Step 1. Log in to Stripe
- Sign in to your Stripe Dashboard.
- Click the ⚙️ Settings icon (top-right corner or sidebar).
Step 2. Go to Business Settings
- Scroll to Account Settings.
- Click Business details (sometimes called Business information).
Step 3. Locate Public Details
- Under Business details, find the Public details section.
- Click Edit.

Step 4. View Your Statement Descriptors
You’ll see the statement descriptor and shortened descriptor used on customer bank statements.

Add this descriptor to Chargeback.io when requested.
You can also update your descriptor on this page anytime. If you do update it, ensure you change the descriptor on Chargeback.io as well.
⚠️ Before editing, review Stripe’s Statement Descriptor Guide to ensure it meets Stripe’s rules (character limits, permitted terms, etc.).
2. Finding Your Stripe ARNs
Step 1. Navigate to Payments
- In your Stripe Dashboard, click Payments from the sidebar or top menu.
- You’ll see a list of recent transactions.
Step 2. Locate the Refund
Search for the refund by order number, amount, or use the Refunds filter to narrow results.
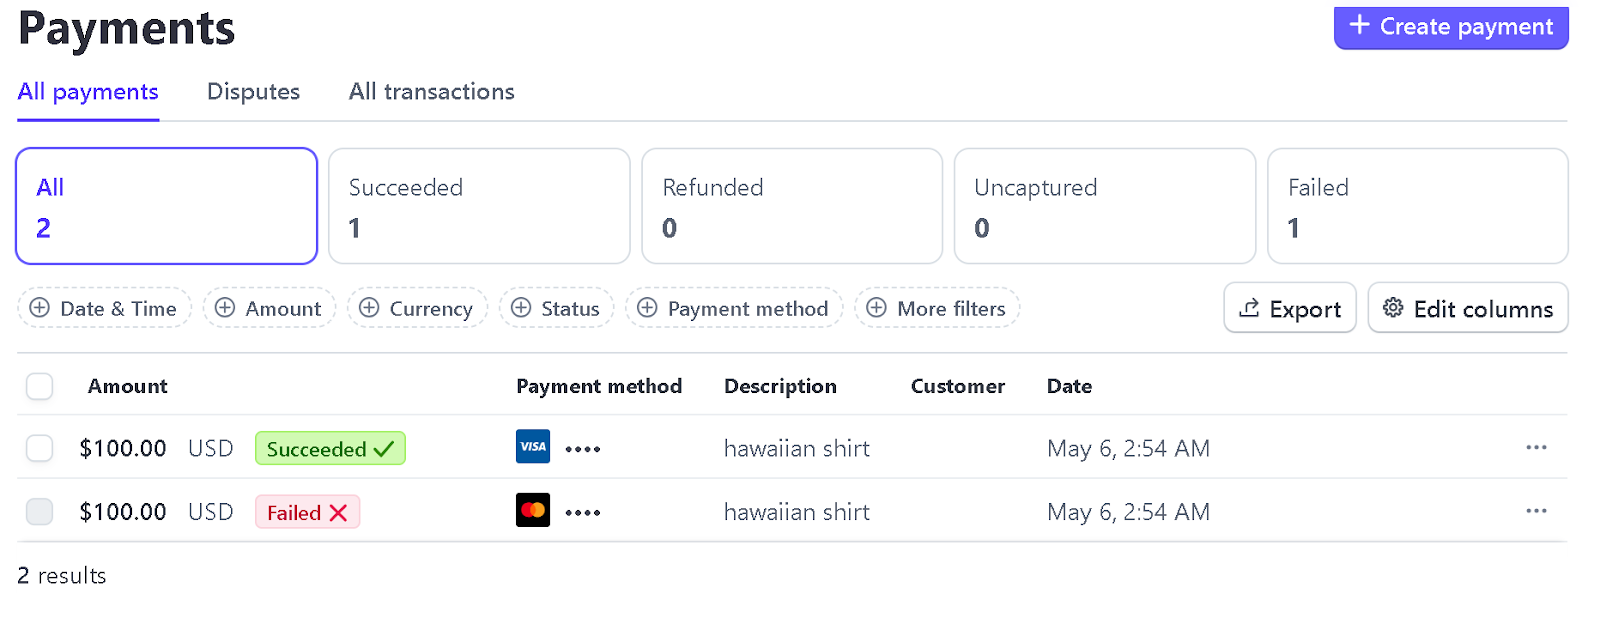
Step 3. Click on the Refund
Click the transaction then on View Details in your timeline.
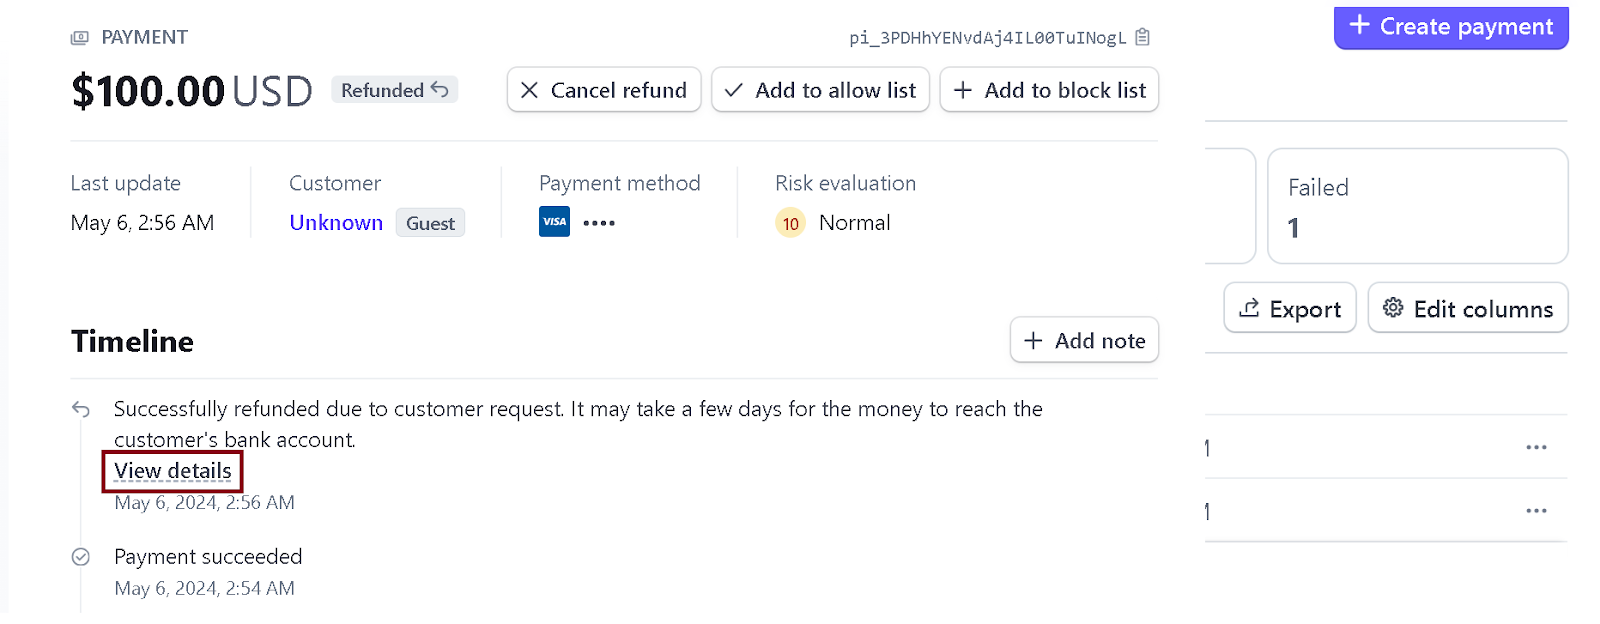
Step 4. Find the ARN
Look for fields labeled “ARN”, “Acquirer Reference Number”, or sometimes “Refund ID.”
If you can’t find the ARN, contact Stripe Support and provide the transaction date. They can locate the ARN for you.

Source: Stripe support
Stripe ARN Statuses:
- ARN is Available: The ARN will display within a refund on your Stripe dashboard.
- ARN Isn’t Available: If ARN is not supported for the refund, you will not be able to see it.
- ARN is Processing (default): The refund has not yet been processed.
⚠️ Important Notes
Some transactions may show a System Trace Audit Number (STAN) instead of an ARN.
- STANs are not accepted.
- Orders that became chargebacks do not display ARNs.
- Contact Stripe to request ARNs for those transactions.
- Each ARN must:
- Be 23 digits long
- Start with a 2 or 7
- Come from a Visa transaction
- You need 4 ARNs to complete setup in Chargeback.io.
- You don't need to submit more than 4 ARNs. This won't speed up enrollment.
What If I Don’t Have Any Refunds or ARNs?
If you don’t have any refunds yet, or if you have fewer than four ARNs, you’ll need to create test refunds to generate them.
Alternatively, you can use your BINs and CAID (also called B&C) instead of ARNs.
Follow this guide to learn how to:
- Get your B&C, or
- Perform test refunds to create ARNs.
How to Add Descriptor(s) & ARNs
Here's how and where to add your descriptor(s) and ARNs:
- In the sidebar, click Alerts to expand the dropdown.
- Select Configure.
- Click
+ Enroll More Descriptors. - Click
Continueon the Integration page. - Enter your billing descriptor(s) in the field labeled Billing Descriptor.
- If you have more than one, separate them with commas.
- During the RDR enrollment process, enter 4 Visa ARNs, separating each with commas.
ℹ️ Be sure to check these FAQs regarding billing descriptors and ARNs.
Activation Times
- CDRN and Ethoca: ~12 hours.
- RDR: ~7+ business days.
These aren't guaranteed activation times. See this guide to learn when they may take longer.
💡 Questions or concerns? Get help from our support specialists at Chargeback.io.